If you are working with your Mac, and then you wish to add a phone number to iMessaged on Mac. If you are new user on this platform then don’t take confusion because in this article, we will guide about ‘how to add a phone number to iMessage on Mac?’

How to Add Phone Number to iMessage on Mac?
In this section, we will spread light step by step about how do you add a phone number to imessage on Macbook. These are incredible easy to do this; below mentioned all things:
Also Read: How to Change Lock Screen Picture on Mac? Easiest Steps
- Firstly, you have to launch <Message Application> on your Mac
- Click on <Messages> option that is showing on the top of menu bar.

- Now go to Preferences > Accounts

- Here you have to need to sign in with your Apple ID and password, and click on sign in.
- Further you click on <Add Email> and <Your Phone Number>
- If everything is ok then you are able to see your phone number under <You can be reached for messages at>.
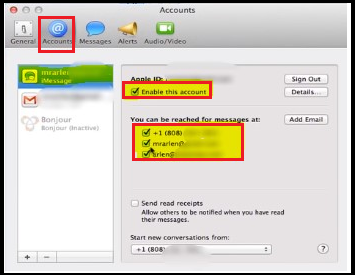
- iMessage will display as highlighted above, and then you account already is added for that choose <Enable this account>. And after that your number linked along with that ID that will visible with your Email Addresses.
If you wish recipients to see your phone number but not your Apple ID, choose your phone number under “Start new conversations from” pop-up menu.
Removing your Phone Number from your Mac
Making ensure that your phone number is added properly and then you have ability to turn it on off for your Messages on your Mac. To do you can follow few steps; below mentioned all:
Also Read: How to Screen Record with Internal Audio on Mac? 4 Easiest Tricks
- Firstly, open your Messages and then it will ask you for getting to sign along with Apple ID that you’re using with Messages.
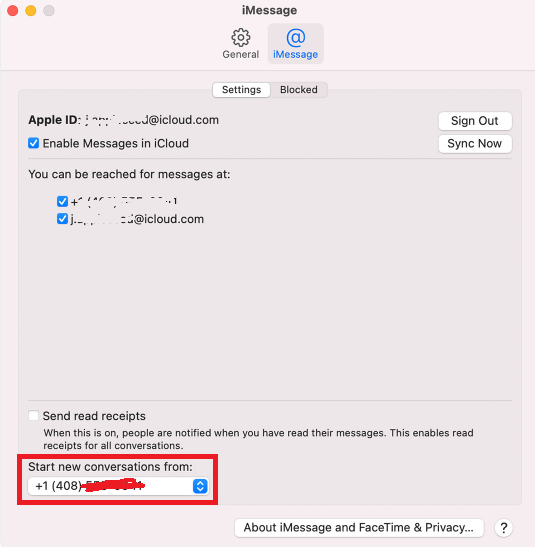
- Now you have to go Messages > Preferences > iMessage.
- And finally, you can deselect your phone number under the “You can be reached for messages at:,“.
Now after log in into icloud and adding your number, you have right to turn ON iMessage from your Mac.
To set up iMessage incredible easy on Mac, because there are no need download and install any addition app from App Store. iMessage is inbuilt feature into all Apple ecosysystems.
You can follow few step to activate your iMessage on your Mac; below mentioned all:
- Open your messages app from your desktop or laptop.
- By default messages app will synchronize along with your Apple ID to sign in. If it does not perform any action then you have to need Apple ID email address and password.
- Go to Menu bar and make click on <Messages> option.
- Now hit on <Preferences> in menu bar.
- Then further click on <iMessage> button.
- Choose your <Phone Number> and <Email ID>, where you want to reach.
- Select which <Phone number or Email Address> under Start new conversations from drop down, and then you can start conversation with them.


